Download files using an open-source SFTP client
Overview
OCLC supports secure SFTP for institutions to retrieve files from OCLC. You may retrieve your files using an open source SFTP client. FileZilla is recommended, as it works consistently with multiple operating systems. FileZilla is freely available from the web and can be found here.
Connect to FileZilla
- Download the FileZilla Client and install it.
- If you don't already have them, obtain your institution's file exchange account credentials (username and password) from OCLC Support.
Interface overview
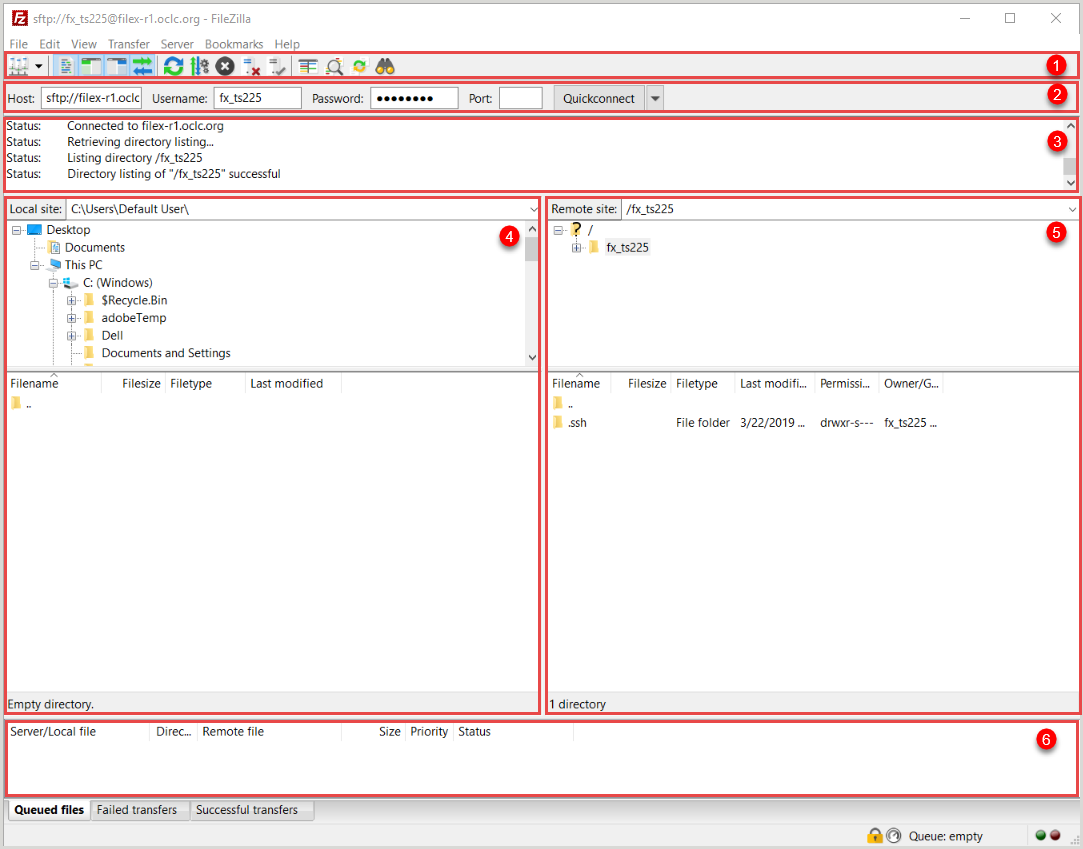
- Toolbar
- Quick connect bar
- Message log
- Local pane
- Remote pane
- Transfer status pane
Quick connect to the server
- Open FileZilla.
- Enter your Host, Username, Password, and Port in the quick connect bar.
- The data center associated with your library's account depends on the region in which you are located. Note that all libraries in regions outside of the United States must use Secure File Transfer Protocol (SFTP) on port 22.
- Click Quickconnect. If this is your first time connecting to the server, the Unknown host key dialog will appear.
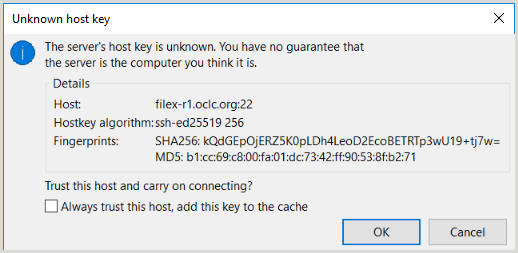
- (Optional) From the Unknown host key dialog, select the Always trust this host, add this key to the cache checkbox to bypass this dialog in the future.
- Click OK to finish connecting to the server.
Set up a site profile
You may want to set up a site profile to make it easy to reconnect to the server. A site profile allows you to store host, username, and password information.
- Site profile - Image
- Click File > Site Manager.
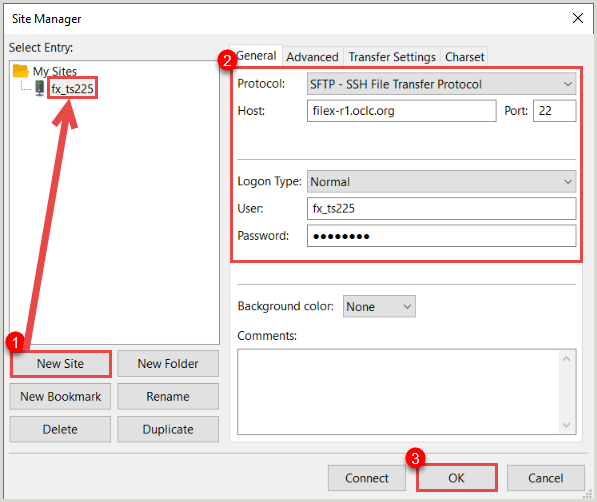
- Click New Site and enter a name for your new site.
- On the General tab, enter and/or select the following information:
- Host: The data center associated with your institution's account
- Port: 22
- Protocol: SFTP - SSH File Transfer Protocol
- Logon Type: Normal
- User: Your institution's assigned username
- Password: Your institution's assigned password
- Click OK to save your entry.
Set a default remote directory
You can set a default remote directory for your files so that you do not have to navigate to the folder every time you want to transfer files. If you do not set a remote default directory, the remote site directory will correspond to your username:
- fx_[OCLC symbol]
- wx_[OCLC symbol]
- Default remote directory - Image
- Click File > Site Manager.
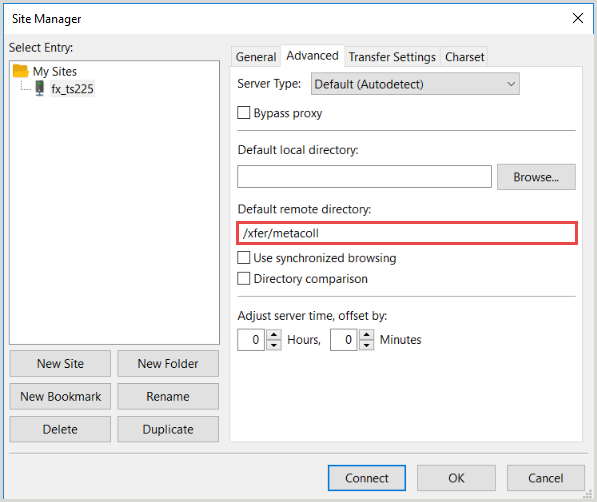
- Click the Advanced tab.
- On the Advanced tab, enter the remote directory you want to set as the default in the Default remote directory form field.
- Click OK to save your entry.
Connect via the site profile
- Open FileZilla.
- Click File > Site Manager.
- In the left navigation, select the site you set up.
- Click Connect.
Download files
- In the Remote pane, navigate to the folder where the files you want to download reside.
- In the Local pane, navigate to the folder where you want the files to reside.
- Select the files to download and drag-and-drop them from the Remote to the Local pane. The files will be added to the transfer queue at the bottom of the window.
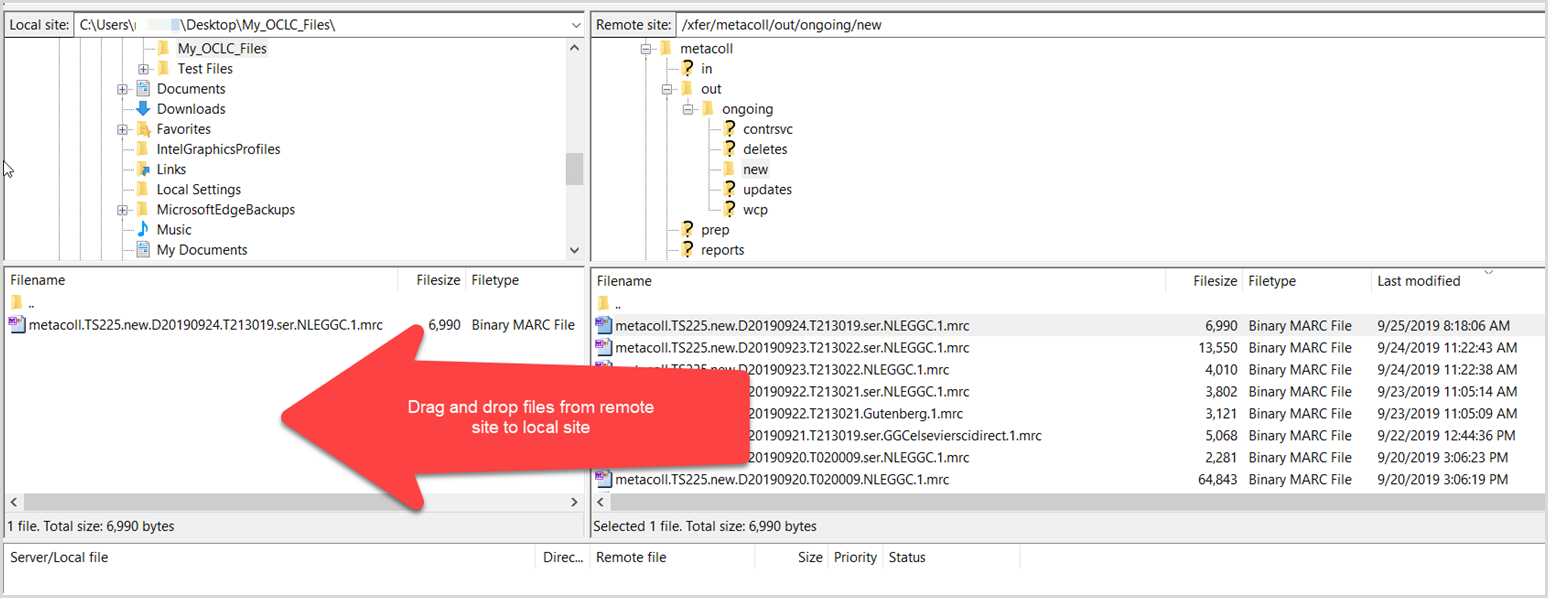
- The downloaded files will appear in the Local pane.
Manually disconnect from FileZilla
FileZilla automatically disconnects from the visible server after 20 seconds of inactivity.
- In the toolbar, click the disconnect button (
 ).
). - In the message log, the status will read Disconnected from server.